Installing a BlueOnyx OpenVZ template with Proxmox VE
The following article demonstrates one approach to installing and configuring a BlueOnyx OpenVZ container using Proxmox VE 1.9. If you’re familiar with Proxmox VE you might have noticed that BlueOnyx has been pulled from the list of community maintained appliances.
The story behind that is not worth repeating, but the official BlueOnyx OpenVZ template is free of charge so it doesn’t make much of a difference.
BlueOnyx OpenVZ template
Get the template named blueonyx-5107R-SL6.1-i386-BX10-20110822.tar.gz which is based on Scientific Linux 6.1.
I had some cce related problems with the latest released container when adding virtual sites, so be sure to pick the one listed above. This could just be a bad download on my part but i haven’t verified that.
Rename the template to reflect Proxmox VE naming convention. The template must adhere to the following convention: <OS>-<OSVERSION>-<NAME>_<VERSION>_<ARCH>.tar.gz. Rename the BlueOnyx OpenVZ template as shown below to to adhere to the naming convention: blueonyx-5107RSL6.1-BX10_20110822_i386.tar.gz
Login to Proxmox VE and select “Appliance Templates” from the menu. From the “local” tab, select browse and upload your blueonyx-5107RSL6.1-BX10_20110822_i386.tar.gz template. On completion, your uploaded template should be shown in the template list.
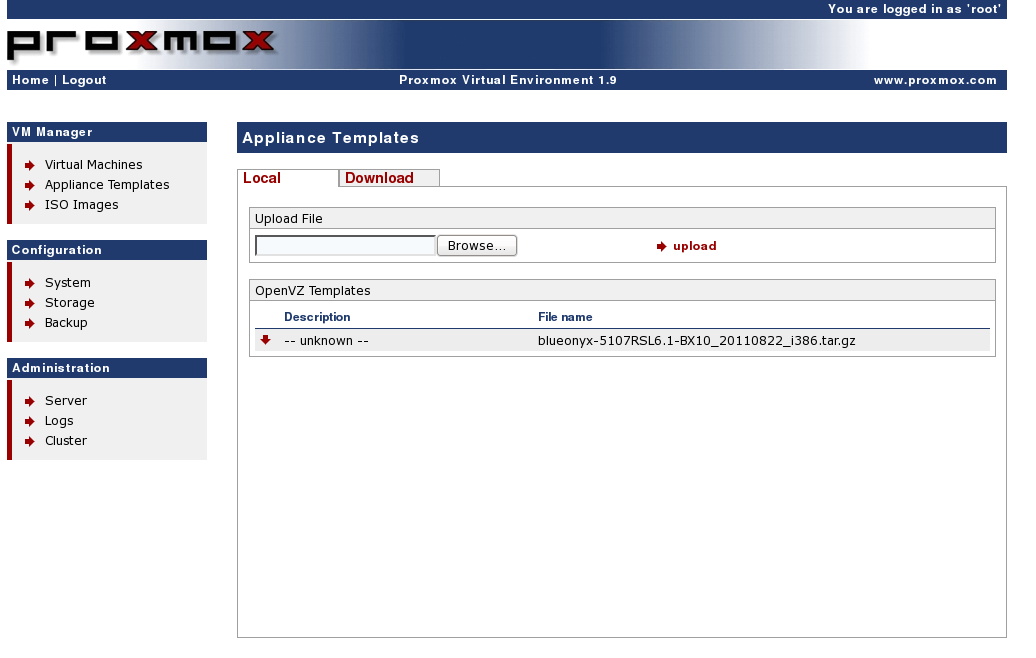
List of available appliance templates
BlueOnyx OpenVZ template configuration
Create a file named blueonyx.conf with the following instructions.
# This configuration file is meant to be used with
# the Redhat, RHEL, CentOS and BlueOnyx distribution kit.
#

ADD_IP=redhat-add_ip.sh
DEL_IP=redhat-del_ip.sh
SET_HOSTNAME=redhat-set_hostname.sh
SET_DNS=set_dns.sh
SET_USERPASS=set_userpass.sh
SET_UGID_QUOTA=set_ugid_quota.sh
POST_CREATE=postcreate.sh
Then upload the blueonyx.conf file to your Proxmox server and place it in the directory /etc/vz/dists. Yes, the config file is just a replica of the redhat.conf, but the name will ensure that it gets loaded with the blueonyx template. The blueonyx.conf file should be owned by root:root (user:group)
Virtual machine configuration
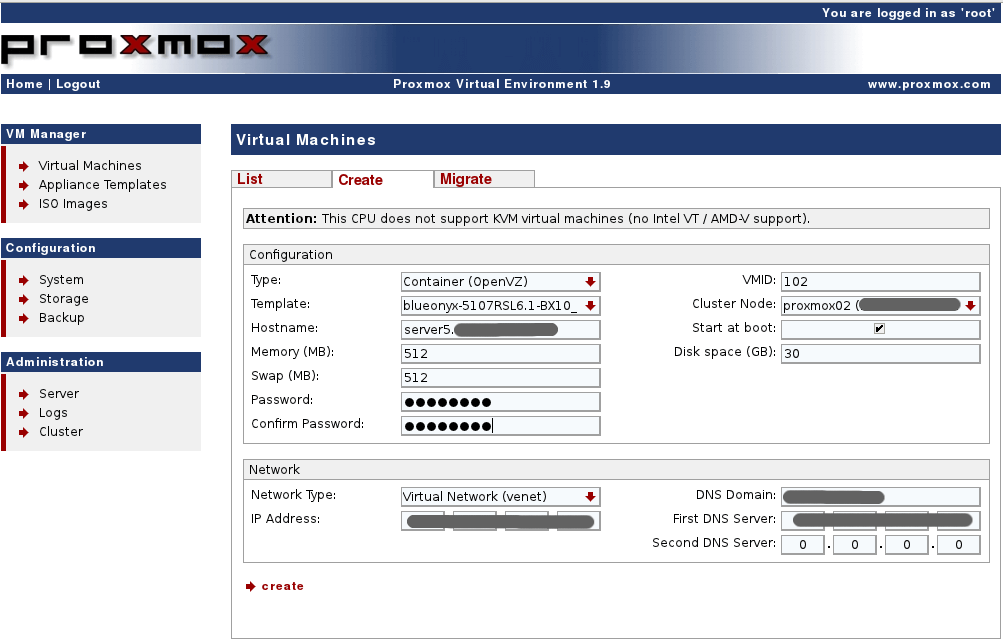
Login to Proxmox VE and select “Virtual Machines” from the menu. From the “create” tab make sure to select “OpenVZ” and your newly uploaded BlueOnyx template.
Crucial details:
- The password has to be “blueonyx” for this setup to work.
- Select venet as the network type (the default for OpenVZ).
- After a successful creation, don’t power on the machine immediately.
Initial BlueOnyx container setup
Login to Proxmox VE and select “Virtual Machines” from the menu. Select your newly created virtual machine and navigate to the options tab. Tick the “Enable User Quotas” option, select your desired number of user/group IDs and save your configuration.
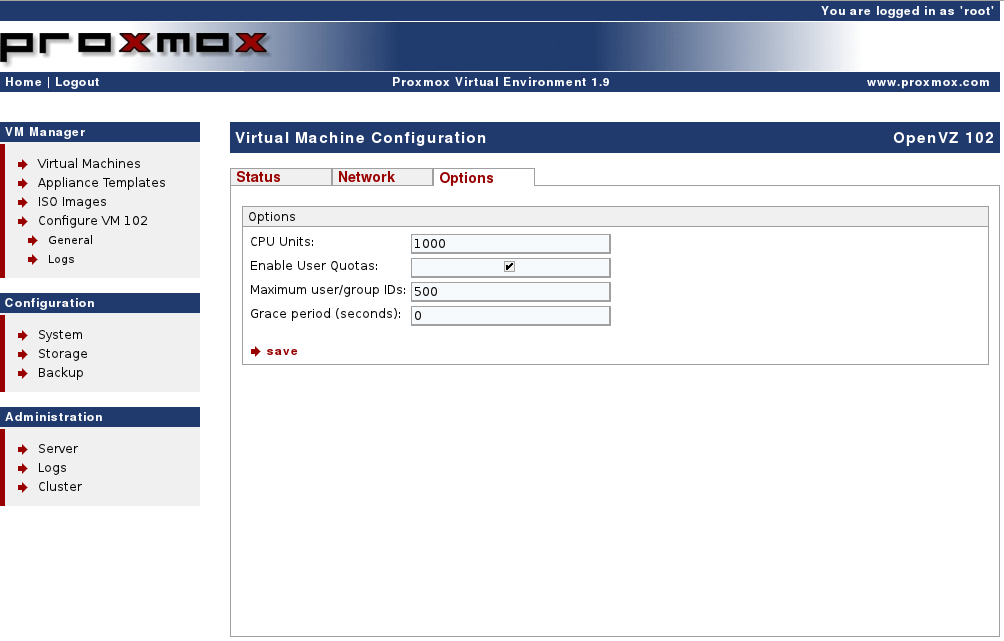
Enable quotas for the BlueOnyx container
Sorting out the network troubles
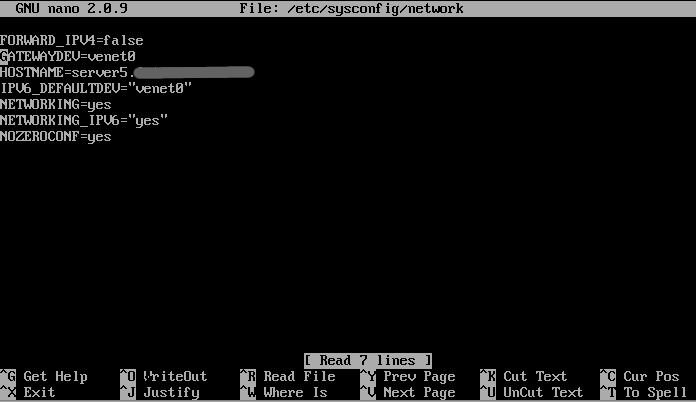
When power on the server and try to load the BlueOnyx GUI, you will notice that the box wont respond and, alas networking is down. From the Proxmox VE, enter the “Virtual Machine Configuration” for your container and click on the “Open VNC console” link. Still from the VNC console, type the command below to edit your network definition.
nano /etc/sysconfig/network
Replace the current gateway address with gatewaydev=”venet0″
Notice the change from gateway to gatewaydev.
Save and protect the file from further change with the command
chattr +i /etc/sysconfig/network
Next, we’ll change the sausalito handler that keeps the routing table current. Still from the VNC console, type the command below to edit the handler
nano /usr/sausalito/handlers/base/network/change_route.pl
Add the code below right before the line that starts with (# Handle
bootproto=dhcp on AWS…), its near the top of the file.
$cce->bye(‘SUCCESS’);
exit(0);
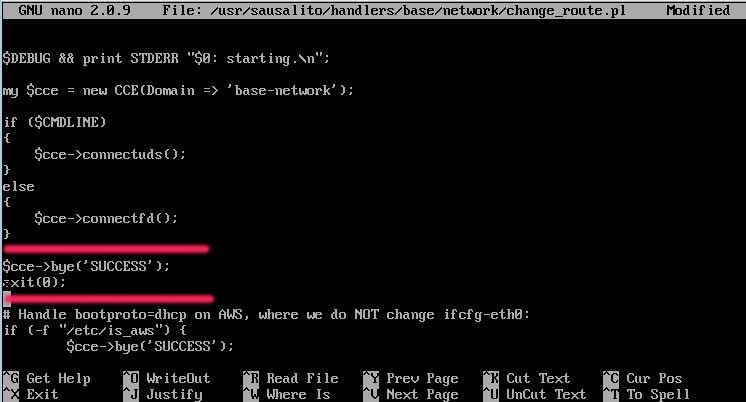
This change to the handler will basically return all cce (Cobalt Configuration Engine) related calls with the status that everything is good with the current routes. A venet connection is a point-to-point connection between the container and the host and as a consequence we can’t define routes from within the container.
Notice that “chattr +i” (read only) is not set for this file as that might cause problem with future sausalito updates, and we would probably want those installed.
Type the command below to to load your new network configuration.
service network restart
Enter the hostname or IP address of your new BlueOnyx server and finish the web based configuration. Reboot the container from Proxmox VE to verify that your network still works, and for good measure i guess. SSH into your box and run “yum update” to get everything current.
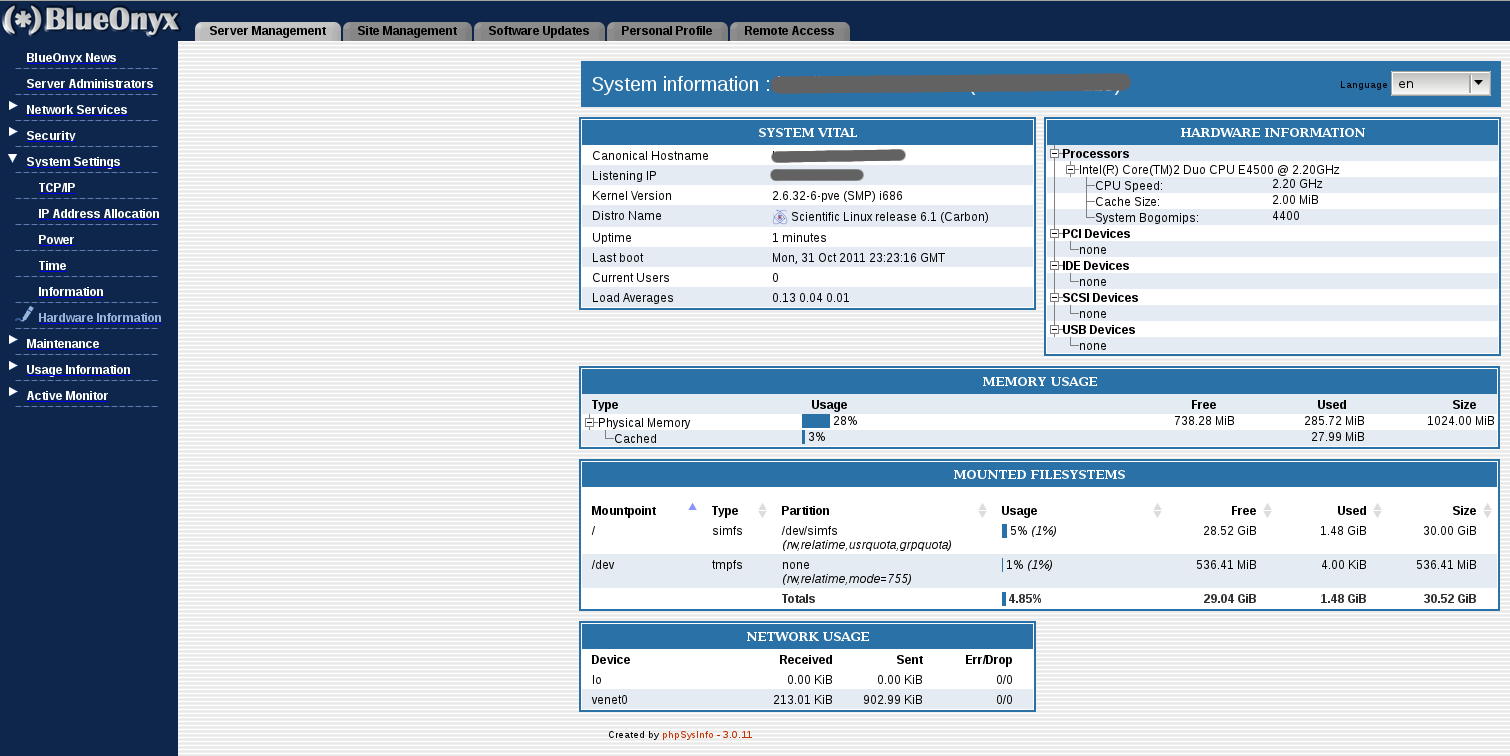
BlueOnyx OpenVZ sysinfo
After updating you might notice that networking has failed due to an update for the change_route.pl handler. The handler will now take care of the /etc/sysconfig/network file by adding the GATEWAYDEV="venet0" if it’s missing (if we had not made the file read only that is). Still, it will also add a lot of excess routes that we don’t need for our container.
edit /usr/sausalito/handlers/base/network/change_route.pl again to restore the missing code from step 7.:
$cce->bye(‘SUCCESS’);
exit(0);
Please note that the BlueOnyx OpenVZ template is being continuously improved and when a new template is released it will probably work out of the box.