Windows 8.1 update - Sorry we couldn't complete the update to Windows 8.1
Having a sick day, I jumped at the opportunity to download and install the latest Windows 8.1 release on my Asus ROG Tytan CG8480 Windows 8-based gaming pc. Since the update came at a solid 3.4GB I decided to let Windows handle this one on its own. When I came back to check out my new Windows system, I was informed that Windows unfortunately couldn’t complete the update.
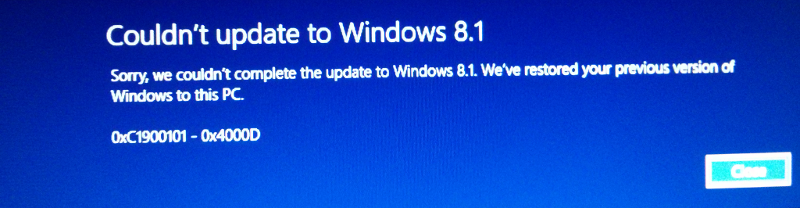
Windows 8.1 update failed to complete.
I had a look at the Windows update log but quickly realized that 5000 lines of information about everything and the kitchen sink wouldn’t get me anywhere soon.
So I did what any reasonable Windows user would do, which is to rinse and repeat. Keeping an eye on the installer I noticed it did a thorough check of the system to ensure compatibility before proceeding with the actual installation. Obviously, by “thorough” I mean the pretty pictures on my screen said it did, whether there was any features to back it up is another thing.
The rest of the install went by with lots of reboots and short messages like “Getting ready”, “Setting up the system” and more “Getting ready”. It seems Microsoft won’t bug the user with any technical garble during the update. In a split second though, I caught an error message saying “Bugcode ndis_driver….” before the installer continued in denial like it never happened.
The update was a failure as previously, but I could now narrow down the problem to my Asus USB-N13 wireless adapter thanks to the bugcode message (NDIS = Network Driver Interface Specification).
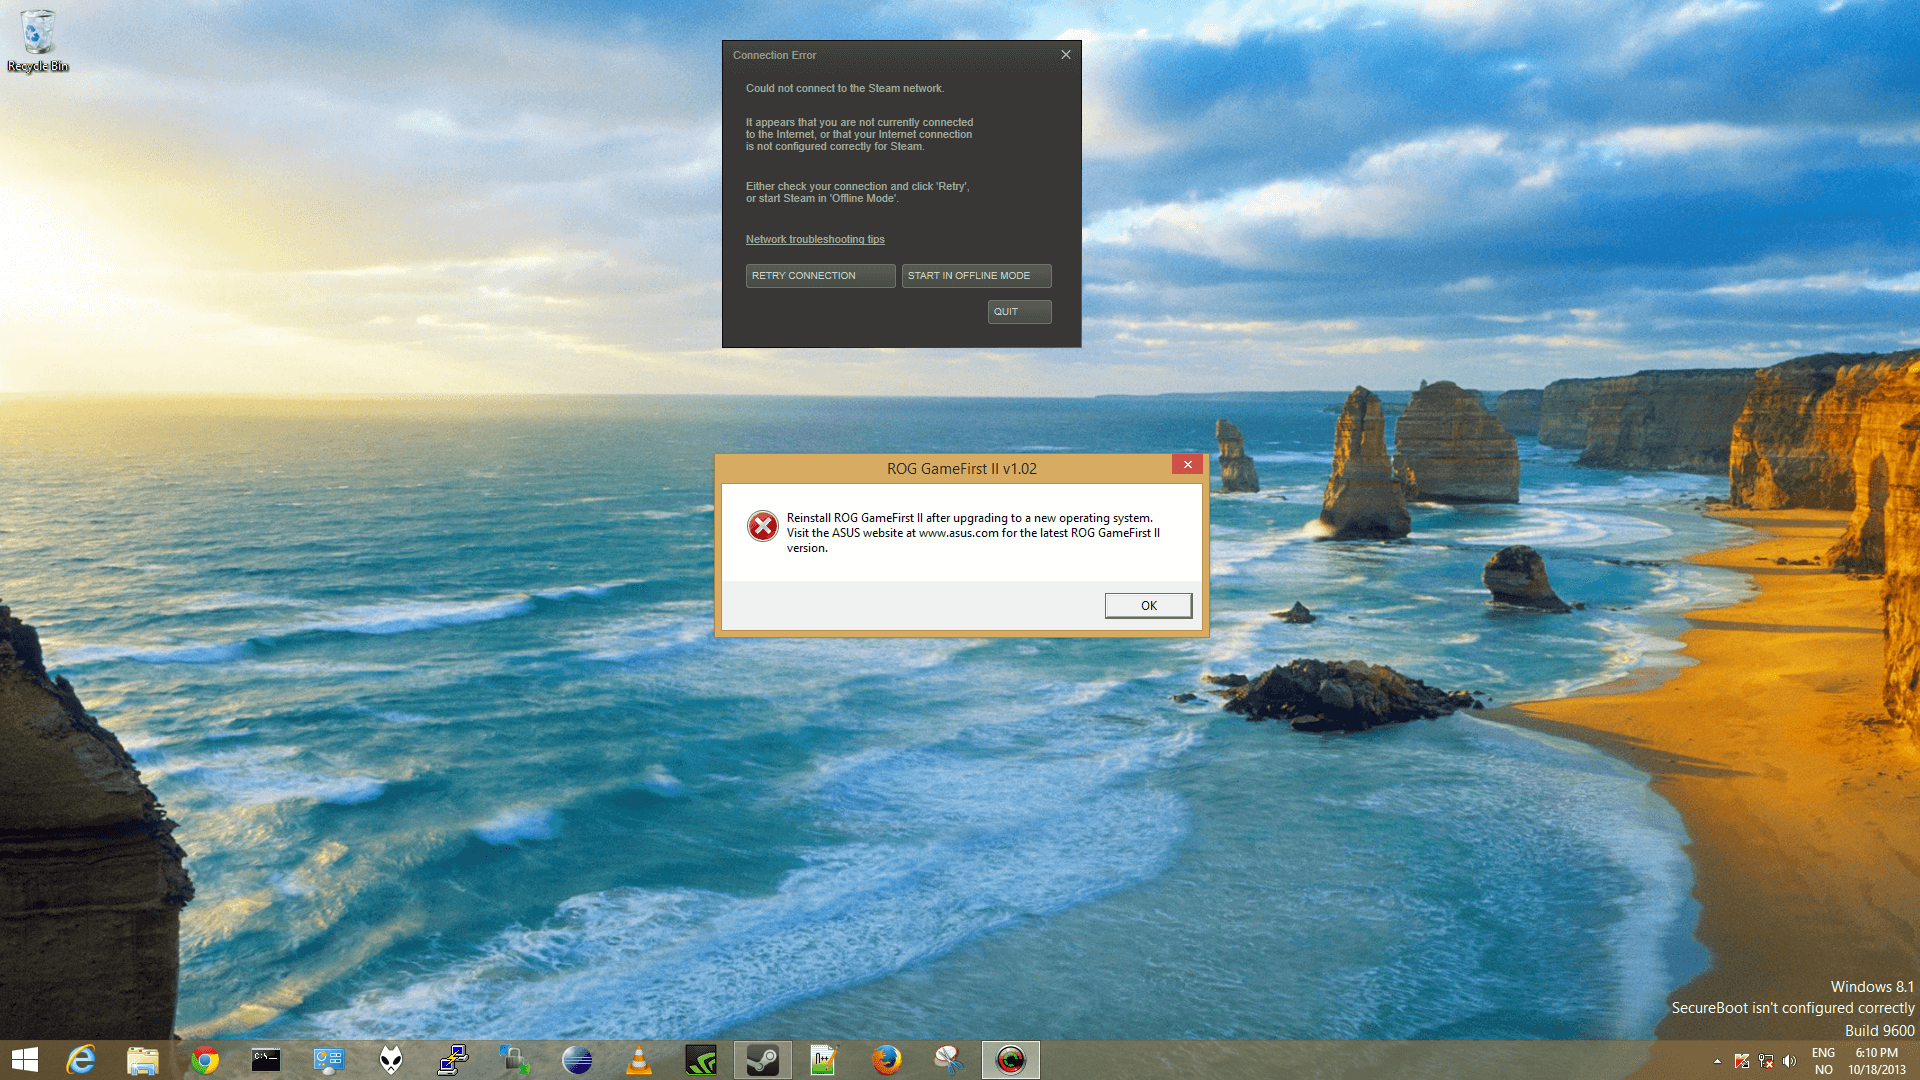
Windows 8.1 - Post update.
Therefore, I removed the Asus USB-N13 adapter before my third attempt at completing the update. This time everything went smooth and I was greeted by the Windows 8.1 license terms. When I later tried to plug in the USB-N13 adapter the system immediately crashed and threw a reboot. This was easily solved by reinstalling the USB-N13 drivers.
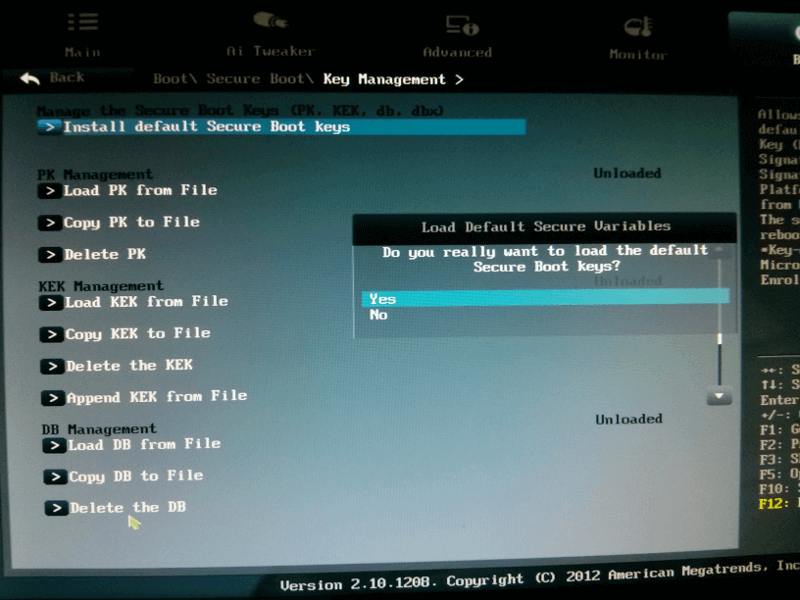
Key management - Load default secure boot keys.
The next concern I had with the update was a watermark appearing at the lower right corner of the screen stating that “SecureBoot isn’t configured correctly”. To fix this problem I had to access the “Secure Boot \ Key Management” part of the systems bios settings, and manually load the default secure boot keys. This took care of the secure boot error message and I could revert to having the system automatically load the secure boot keys from the BIOS database. This issue could possibly have been avoided by upgrading the BIOS before installing the Windows 8.1 update (if such an update is available).
I must admit to not having done this many install attempts since Window was delivered on floppy disks. Nor am I blown away by the new features, but as long as I can play my games I won’t complain….. too much that is.